For a creative entrepreneur with a vision, starting a clothing line may be an exciting and daunting experience. How and where to start are important questions to answer. This post will guide you on how to launch your own clothing line, whether you want to start with a simple line of printed garments or an extensive cut and sew collection with a catalogue of items.
The Steps
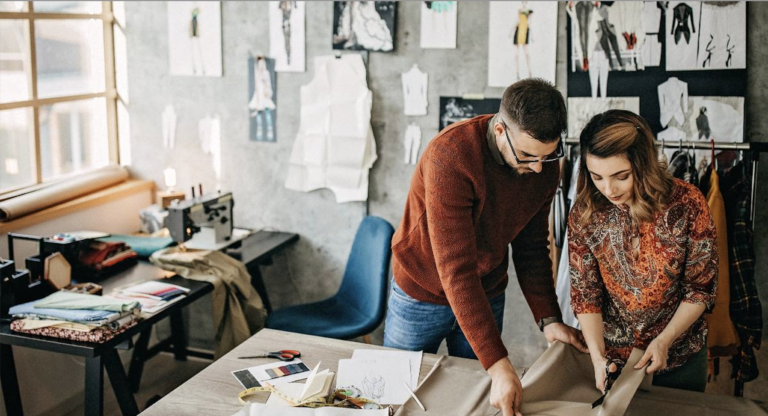
Step 1: Create a Tech Pack
The fashion designs that you work on should have an accompanying tech pack. A quality clothing manufacturer will never take an order from you without a tech pack. They need to have clarity on what is expected of them, what the style looks like, what the materials are, the trims, the prints, and at the same time, you need to be able to hold them and yourself accountable for the designs that you’re executing on. So step one is to prepare a tech pack. Before you go into production, prepare a comprehensive tech pack. This should convey to your manufacturer everything they need to know to manufacture your specification. It should leave little in the way for guess work.
Step 2: Order Sample Fabric
Once you’ve delivered your finalised tech pack to your clothing manufacturer, you need to figure out where you are sourcing your trims and your fabric from (i.e. if you are doing it yourself). Once you have your fabric supplier, make sure to order what is known as a ‘sampling fabric’ or ‘sample fabric yardage’. Sample fabric yardage should be in the correct composition and the correct colors.
Step 3: Develop Your Pattern
Now you would want to develop your pattern. A pattern is essentially sewing schematics. It basically looks like the flat version of a garment, and it can be quite technical to develop a pattern. Not all fashion designers are actually able to develop patterns, and there are dedicated professionals known as pattern makers that are exclusively geared towards creating and developing patterns based on points of measurement, technical sheets, or other types of specifications.
You want to create a pattern or have a pattern created on your behalf before going into your initial prototype. Most clothing manufacturers will always be able to offer you a pattern-making sort of solution based on a quality tech pack. But do bear in mind that if you don’t provide the necessary information in your tech pack, a pattern maker will not be able to develop a pattern. Therefore, make sure that your tech pack has a flat or at least a point of measurements page, which will run the clothing manufacturer through key points of measurements in a flat one-to-one format. You don’t need to be a pattern maker to be able to accurately represent how you want your fabric to fit. However, pattern making is an art, and that is why dedicated pattern makers exist to create quality patterns so that your fabric can fit.
Step 4: Create A Prototype
Once you have your prototype pattern created, you can go ahead and have your clothing manufacturer create a prototype. This step is known as a prototype sample stage. The first sample that you’ll be creating should be made with the correct details regarding silhouette fit measurements. Some basic trims and detailing should also be there. But bear in mind that you will need to go through multiple prototypes before you create the perfect one. All of this is meant to give you a physical representation of your design and to get you going into the next stages of your production.
Step 5: Create A Fit Sample
Now you have to create a fit sample. Following the prototype sample that you created earlier, you will take the confirmed design details, whether you move a pocket or change the headline, you want to take those details and use it to create what is known as a fit sample. It is a sample different from your prototype sample in the sense that it should be using the correct yard edge. So the fabric that you ordered earlier on in the process should now be ready and prepared to implement into your fit sample. You’ll also want to use a consistent fit model, whether that’s yourself, your partner or a specific professional that you hire, make sure to have a consistent crosser brand fit. Use a similar type of fit model for different styles that you have, whether it’s female or male. Make sure that you pick the correct person to represent your brand. You will want to make sure that your fit sample has the corrected fit and pattern adjustment, because if something doesn’t fit correctly, the pattern needs to be fine tuned to go into batch production. So this is the stage where you can make most of the fine tuning, and you’ll have a lot more clarity on how a garment fits, because you should be using the correct fabric at the station.
Step 6: Select the Final Sample
You will want to select the final samples from your sample style collection. What does that mean? Well, based on your prototypes and your fit samples, you should have a clear idea of which styles best fit your production needs, whether from a price point or a time delivery standpoint. If some styles are too difficult to create within a certain time frame due to their complexities or if they are too expensive, make sure you consider the implications of going ahead with the product. You should be well versed with your labor costs, fabric costs, hardware costs and your trips that you’ll be attaching to the garment and you have a very, very clear idea of how much each garment is going to cost you. If this aligns with your price point and what you’re looking to create then you can proceed on to the next stages of the production process. If the product fails to meet your goals, then you can drop it and shelf it for later use.
Step 7: Take Orders on Production Styles
This stage starts by taking orders or presales on your production style. Now that you have your production styles figured out, start offering these production styles online for presale whether it’s direct to the consumer or to showrooms as a wholesaler. At this stage, you have a clear idea of which styles are most in trend, and it’ll give you the peace of mind to know that once you have these styles finished, you have customers ready and waiting for them. In the modern business world or the E-commerce world, this is known as pre-sales. You can offer presale incentives to your potential customers by potentially giving them exclusive access to limited funds, select styles and color ways, or just offering them a discount. There’s a ton of things that you can do to entice your customers to bite early and at the same time to align your interest with their interest in terms of giving them a great product at a great price and to earn their loyalty.
Step 8: Grade your Patterns
Now that you have your production style confirmed and you know what you’ll be receiving, it is time for batch production. Grading your patterns involves taking your confirmed fit sample and applying simple mathematical measurements to grade the patterns between the different sizes. Let’s say your fit samples are based on a size medium and you’re ordering a size S to XL. Then your pattern maker is going to have to take pure approved measurements for a size medium, grade them down for the size, small and grade of other for a size large and extra-large. This is something that a dedicated pattern maker would be able to do. Just bear in mind that it is quite a mathematical process, and it does take a bit of expertise and technical training to implement correctly. So make sure you’re working with the right people.
Step 9: Create PP Sample
Now you’ll want to create your PP (i.e. pre-production) sample. The reason we call it a pre-production sample is that once you’ve confirmed your order with the clothing manufacturer (i.e. after you have placed the deposit), they can access all the fabrics from the materials they need to create the correct production. You want them to create a perfect style based on all of the feedback and comments you gave for the fit sample, the prototype sample, and all the other patterns created to create the perfect PP sample that they can use for finalized production. The PP sample must be 100% accurate towards what’s going to production with zero mistakes to assure that the clothing manufacturer doesn’t make any mistakes based on how they’re referencing that PP sample down the line so that PP sample will act as a carbon copy of how you have finished production.
Step 10: Order Bulk Production
Now that you have a confirmed PP sample, you can ask your clothing manufacturer to proceed with the bulk production. Your clothing manufacturer should be using the correct PP sample details in order to create this, which is known as the bulk production. You will want to make sure that your clothing manufacturer has a production manager, whether it’s a third party person entity or someone that is in the organization to communicate effectively with the production lines. Having a good line of communication with a production line is key. That’s where a good production manager will come in handy.
Step 11: Implement Quality Control
You will want to implement a quality control, whether that be a third party entity coming from the outside in, a design agency, a sourcing agency that you’ve hired, or someone integrated into your business. You will have to make sure that quality control is conducted at several intervals throughout the process in order to ensure that your finalized products are exactly as they are intended to be, whether that’s once all garments are completely cut, once fabric is received into the warehouse for the first time, before ironing and packing or before they are shipped out. Quality control checks at the right stages will ensure that you have your finalized production and the quality standards that it’s intended to be. This will save you a lot of money down the line and will ensure that both you and your supplier can do business together for the long run.
Step 12: Packing and Shipping Process
You must ensure that your clothing manufacturer is following through the standards regarding packing information, whether they’re packing the garments in individual poly bags that you’ve supplied, or they’re packing them to stock poly bags with other types of final delivery goals. Make sure that they’re following your standards and that everything is packed in a way that is presentable for the end user. If you’re a wholesaler or retailer, make sure that you follow your buyers’ requirements. Buyers can refuse to receive or take receipt of shipments, so making sure that delivering your products in a presentable way that aligns with their requirements is key. This will be something that you have to double check with each buyer that you’re working with and integrate correctly.
The last thing you want is to be dealing with five different buyers and having different requirements for each. This is going to drive up your costs and it’s going to actually raise the possibility of making mistakes. You must ensure that your clothing manufacturer follows your correct packing methods and that they will provide you with a packing list for all shipments. At this stage, once you complete your final payments, you will be able to ask them to release the goods with other shipping documents or invoices that you’ll need in order to clear your shipment once it arrives at your port.
Conclusion
At OloBird, we help fashion brands grow with one-stop, end-to-end manufacturing. We help develop product ideas, produce FREE samples, manufacture from top clothing manufacturers (the same ones who manufacture for Boss, Puma, M&S, GymShark, and many others) and handle shipment. With OloBird there is no minimum order quantity requirement, thus, ensuring both quality and flexibility to our users. Olobird’s clients do not have to worry about the lengthy process of creating their dream fashion line, we take the hassle out of their hands whilst they can focus on brand building. For more information you can look into www.olobird.com.